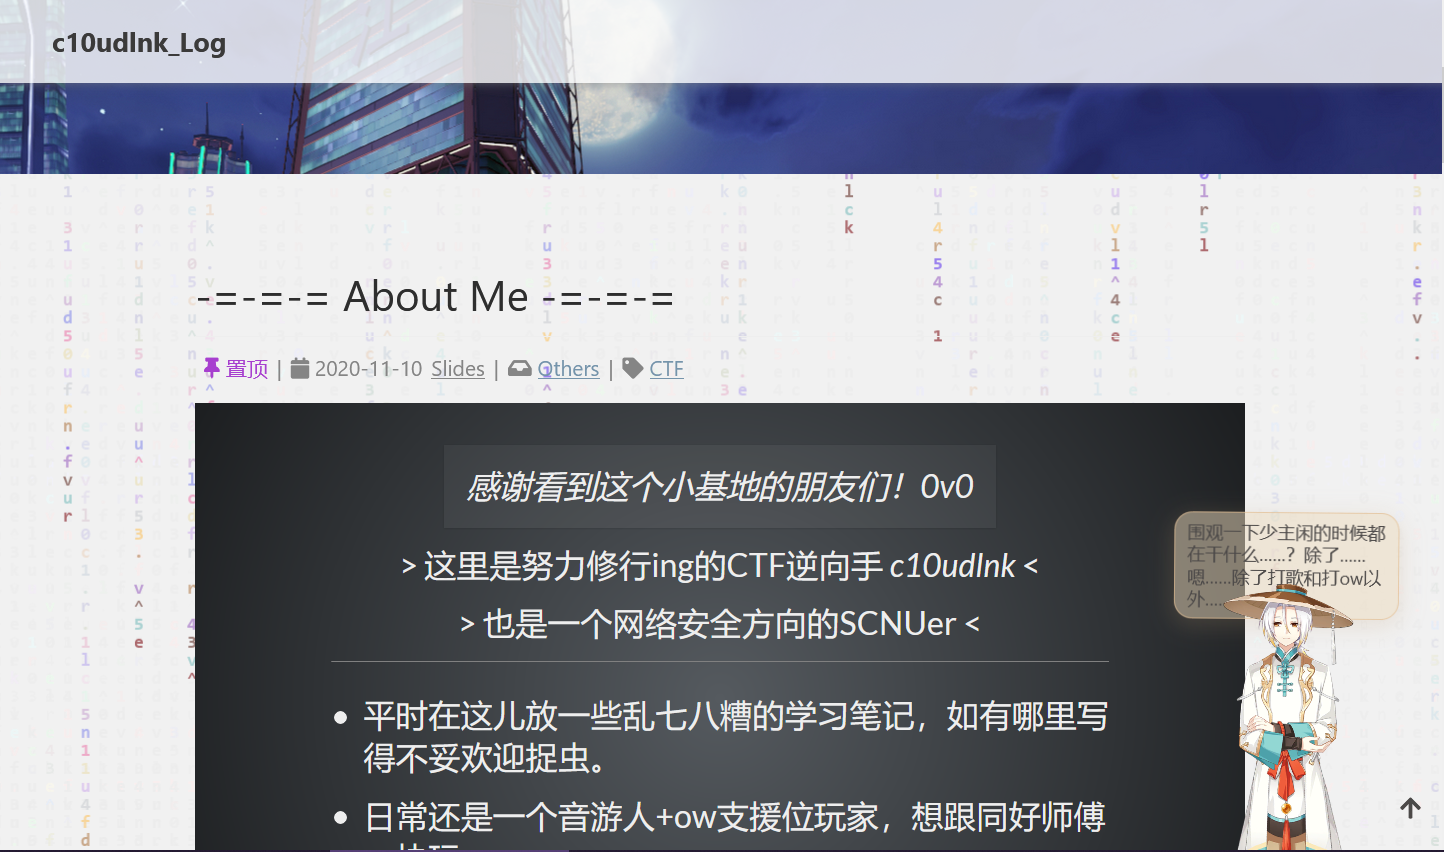
一个多月前折腾完的melody主题上的背景代码雨特效,今天终于良心发现来填坑了)
顺便吐槽一句melody相关的资料真的好少,完全靠自己看主题源码+和其他主题对比来摸索,这大概就是开荒的痛并快乐着吧T.T。(形成用户生态是有多重要.jpg
参考文章(Hexo 博客优化之博客美化系列(持续更新))里的是以Material主题为例,本文以Melody主题为例。
背景效果如图(https://c10udlnk.top/):
以下步骤均以博客文件夹为当前目录。
js文件创建
在.\node_modules\hexo-theme-melody\source\js下新建一个DigitalRain.js(跟参考文章的不一样,原文章的特效定位有问题,所以这里有魔改):
1
2
3
4
5
6
7
8
9
10
11
12
13
14
15
16
17
18
19
20
21
22
23
24
25
26
27
28
29
30
31
32
33
34
35
36
37
38
39
40
41
42
43
44
45
46
47
48
49
50
51
52
53
54
55
56
57
58
59
60
61
62
63
64
65
66
67
68
69
| window.onload = function(){
var canvas = document.createElement('canvas'),
context = canvas.getContext('2d'),
pr = window.devicePixelRatio || 1,
width = window.innerWidth,
height = window.innerHeight
canvas.width = width * pr
canvas.height = height * pr
context.scale(pr, pr)
context.globalAlpha = 0.8
canvas.style.cssText =
'opacity:0.8;position:fixed;top:0;left:0;z-index:-1;width:100%;height:100%;pointer-events:none;'
document.getElementsByTagName('body')[0].appendChild(canvas);
var fontSize = 12;
var colunms = Math.floor(canvas.width /fontSize);
var drops = [];
for(var i=0;i<colunms;i++){
drops.push(0);
}
var str ="r3ver5e.4^fun c10udlnk";
function draw(){
context.fillStyle = "rgba(238,238,238,.09)";
context.fillRect(0,0,canvas.width,canvas.height);
context.font = "600 "+fontSize+"px Consolas";
context.fillStyle = randColor();
for(var i=0;i<colunms;i++){
var index = Math.floor(Math.random() * str.length);
var x = i*fontSize;
var y = drops[i] *fontSize;
context.fillText(str[index],x,y);
if(y >= canvas.height && Math.random() > 0.99){
drops[i] = 0;
}
drops[i]++;
}
};
function randColor(){
var r = Math.floor(Math.random() * 256);
var g = Math.floor(Math.random() * 256);
var b = Math.floor(Math.random() * 256);
return "rgb("+r+","+g+","+b+")";
}
draw();
setInterval(draw,35);
};
|
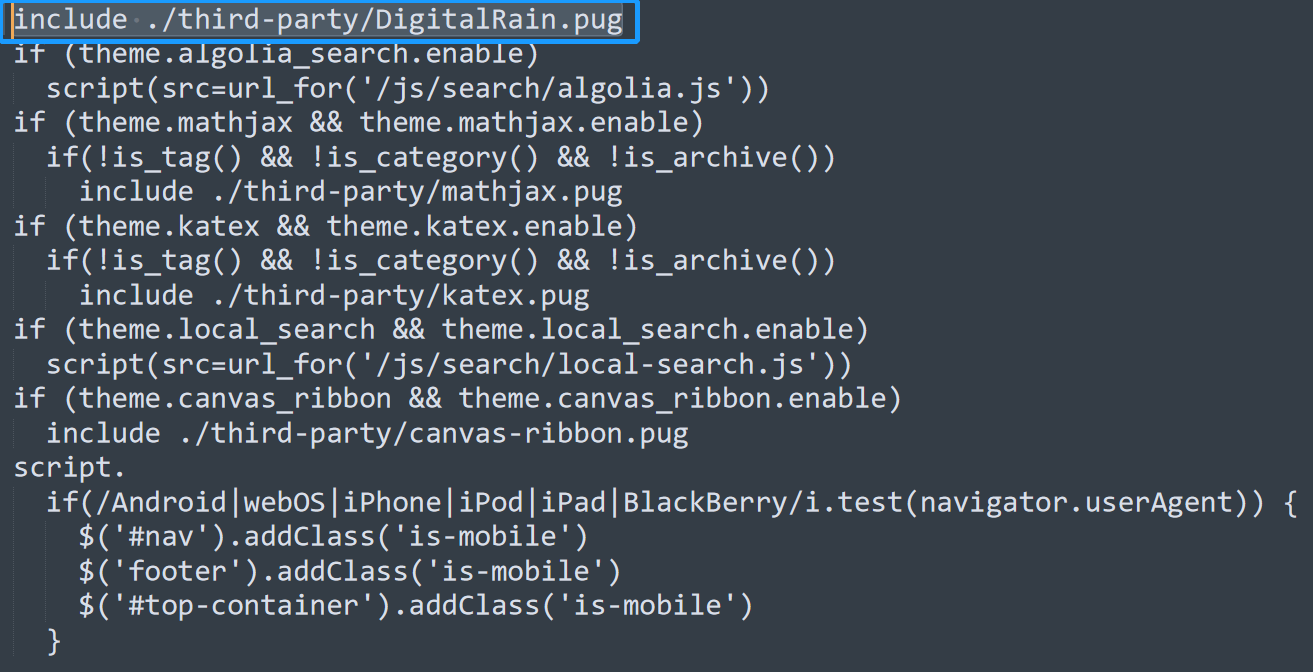
更改pug文件
把.\node_modules\hexo-theme-melody\layout\includes\additional-js.pug里最开头添加一句:include ./third-party/DigitalRain.pug
然后在.\node_modules\hexo-theme-melody\layout\includes\third-party下新建一个DigitalRain.pug:
1
| script(src=url_for('/js/DigitalRain.js'))
|

这样背景就有代码雨特效啦~
